- At the End of Act Two: Confronting the Apostle of Myrkul
- Simplifying the Battle
- 1) Song of the Night
- 2) Letter from His Wife
- 3) Dialogue Choices
- Preparation
- Battle Tactics
- 1) Rescue Lady Aylin (if she is present)
- 2) Eliminate the Assistants
- 3) Be Careful on the Platform Near the Boss
- 4) Distract
- 5) Exploit the Boss’s Weaknesses
- 6) Spread Out the Party Members
- 7) Legendary Action
- Achievement
- Reward
At the End of Act Two: Confronting the Apostle of Myrkul
At the end of the second act, after we defeat Ketheric Thorm in the Illithid Colony, we will face a powerful boss — the Apostle of Myrkul.
Simplifying the Battle
You can shorten the battle with the Apostle of Myrkul in Baldur’s Gate 3 if you:
- Rescue the Song of the Night from her prison.
- Find certain items in Moon Towers.
- Choose the correct dialogue options.
1) Song of the Night
Having Lady Aylin, whom you will rescue in the Shadow Realm (Torm’s Mausoleum), will significantly help during the passage. Of course, if you decided to make Shadowheart a dark Justiciar, then, unfortunately, this opportunity is lost.
2) Letter from His Wife
In Moon Towers, before going to the roof to face Ketheric, unlock the door to his chambers and search the luxurious chest at the foot of the bed. There you will find a letter from Ketheric’s wife, Melodia. Be sure to read it before moving on.
3) Dialogue Choices
Before the first battle with Ketheric on the roof of Moon Towers, choose the following dialogue options:
- [PERSUASION] “Melodia did not want to see you like this, Ketheric. Stop, and perhaps you can still find redemption.” (Difficulty – 10)
- “Melodia awaits you in the afterlife. Return to Selûne, and your souls will reunite.”
- “I will help you, Ketheric, if you let me.”
- “Wait… Ketheric surrendered.”
After this, the unavoidable battle on the top of Moon Towers will begin, but the correct conversation here opens the way to an easier battle later on.
Then, in the depths of the Illithid Colony, during the next meeting with Ketheric, continue to convince him to surrender:
- “What is my fate, Ketheric?” or “Why do you need this prism?”
- [PERSUASION] “I was ready to spare you. It’s not too late. You can still repent.” (Difficulty – 18)
If we pass the check, Ketheric will commit suicide, and we will have to fight the Apostle of Myrkul directly.
Preparation
To defeat Myrkul in Baldur’s Gate 3, preparation is required before descending into the Illithid Colony. Stock up on elixirs of necrotic damage resistance, as well as various arrows for ranged attacks.
To save time moving across platforms, buy scrolls or potions of flight or misty step, as well as teleportation arrows. Additionally, set up your party to get rid of anything that deals poison, lightning, and necrotic damage, to which Myrkul is immune.
However, he is weak to the following types of damage:
- Radiant
- Fire
- Lightning
Take these in large quantities in your arsenal.
Battle Tactics
1) Rescue Lady Aylin (if she is present)
If you freed the Song of the Night, she will help fight the Apostle of Myrkul, but there is one nuance. Before the battle begins, she is on an elevation to the right in the soul cage. While Aylin is imprisoned, the Apostle will be immortal and take no damage.
Choose a character who will help the Song of the Night and lift the boss’s immortality. The best choice for this is a character with healing spells to heal Aylin in time. Also, give him a scroll, like “Misty Step,” to immediately move to the prisoner.
A Small Trick: Invisibility Tactic. To start the battle with Aylin already freed, detach the necessary character from the party and use an invisibility spell or potion to sneak up to the Song of the Night unnoticed and free her.
Don’t worry, the scene with Ketheric where you can persuade him to surrender will occur after you free the Song of the Night from the soul cage. In this case, the first turn should be yours.
2) Eliminate the Assistants
Besides the Apostle himself, we will be fighting: 4 necromite skeletons, intellect devourers, and 1 illithid. The Apostle will also periodically summon necromites from the bone cache.
First, it is best to kill the illithid (located on the right platform above), as it can stun any of your heroes if they fail the check. Next, you should deal with the necromites (they stand in groups on the left platform) since the Apostle, by devouring them, can use the “Death Ray,” which can instantly deplete all health.
3) Be Careful on the Platform Near the Boss
It’s better not to climb onto the platform where the Apostle is located — “Presence of Myrkul” debuff acts there. Healing in his aura becomes impossible.
However, Lady Aylin can fly there, and healing her in time will be impossible. In this case, you must rely on luck. Additionally, every few turns, the Apostle of Myrkul activates an ability that draws everyone in the radius to the nearest platform and deals necrotic damage.
4) Distract
To distract the Apostle and his assistants, you can use any summoned creatures: elementals, familiars, Guardian of Faith, etc.
5) Exploit the Boss’s Weaknesses
Since the Apostle of Myrkul is vulnerable to radiant, lightning, and fire damage, rely on such types of spells and enchanted arrows. Long-lasting spells like “Cloud of Daggers” will also be helpful.
6) Spread Out the Party Members
It will be effective to spread the characters around the platforms surrounding the Apostle and use ranged attacks against him.
7) Legendary Action
Killing Myrkul on “Valor” will be challenging because of the new legendary action and resistance:
- Legendary Action “Gaze of the Dead” — on any creature that strikes first in each round, he imposes fear and 9-37 necrotic damage. Ideally, use any summoned creatures to absorb the damage and avoid attack roll penalties.
- Legendary Resistance “Disable” — +10 to the next spell that disables.
Achievement
You can attempt to get a rare achievement for this battle — “No Free Lunches / Faster.” To complete it, you need to defeat the Apostle of Myrkul before he devours even one necromite. The difficulty lies in the fact that necromites will periodically spawn from cocoons.
One way to achieve this can be seen in the video guide:
Reward
After killing the Apostle of Myrkul, a cutscene will occur where you take one of the netherstones from Ketheric Thorm’s armor. You will collect the other two in Act 3.
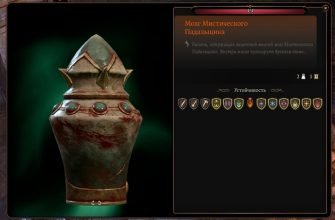
Additionally, he will drop several interesting items:
- Ketheric’s Shield (Rare) — provides advantages on dexterity checks and adds a reaction to knock a foe prone.
- Armor “Embrace of the Reaper” (Very Rare) — this armor reduces all incoming damage, makes the wearer immovable, but imposes a dexterity check penalty. It also grants the ability “Howl of the Undead,” which can cause paralysis in a target.
- Ketheric’s Warhammer (Rare) — an enchanted hammer with additional psychic damage.