Introduction
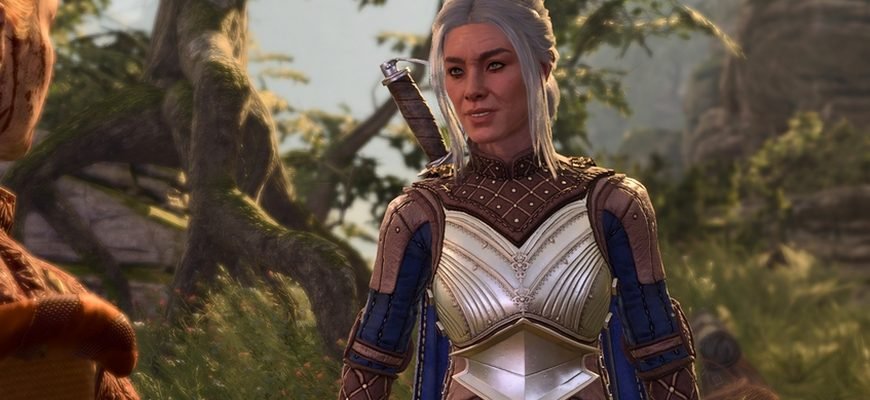
In Baldur’s Gate 3, Lady Esther is a character you encounter on your way to the Githyanki Creche. She is a member of the Blades of the Fracture and an adventurer.
First Encounter
Lady Esther can be found on the path to the Rosymorn Monastery near the “Trielta Cliff” teleporter.
If you talk to her, she will tell you about her unsuccessful visit to the Illek Creche, where her request to purchase a Githyanki egg was categorically denied.
Lady Esther will also explain that the egg is needed for the Blades of the Fracture’s experiment to raise a Githyanki in a world of care and compassion, to overcome their natural cruelty.
She will offer you a reward of 250 gold coins if you retrieve the egg from the stubborn Githyanki and bring it to her.
Additionally, you have the option to trade with Lady Esther in Baldur’s Gate 3. She has a decent assortment of items, including some rare ones, especially useful at the beginning of the game. It’s advisable to trade with her before making any decisions, as you can access the trade menu directly in the dialogue with Esther.
Agreeing to Bring the Egg
If you agree, you need to enter the incubator in the Illek Creche. Before departing, you can request an advance payment by choosing in the dialogue:
- [Persuasion]: “Fine, but I want the payment upfront.” (Difficulty — 21)
Where to Find the Githyanki Egg
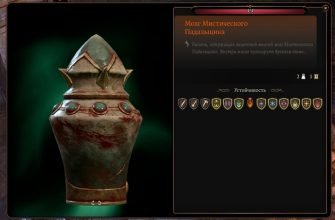
The egg is in the incubator located in the western part of the Creche.
You have a couple of options for retrieving it:
- Steal it.
- Persuade the incubator keeper Kokuu to give it up.
After obtaining the egg, bring it back to Lady Esther. She will thank you and pay you for the task, provided you did not take an advance payment.
Giving the egg to her will cause strong disapproval from Lae’zel if she is in your party.
But the story doesn’t end there, as in Act 3, you’ll learn about the continuation of what seemed like a minor episode.
Consequences
In Act 3, you can find Lady Esther in the Lower City, in the house of the Blades of the Fracture, to learn about the progress of their experiment.
However, upon entering the house, you’ll only see blood pools and dead members of the Blades. On the second floor, in the bedroom, you will find a portal as well as correspondence between the woman and troubling notes about their experiment in the dwarf Havklaag’s journal.
Passing through the portal leading to the Blades’ basement, you will find Lady Esther’s body and a young Githyanki named Ptaris hatched from the egg.
The “Speak with Dead” spell cast on Esther’s body will be of no use, but Ptaris himself will tell you what happened.
He will reveal that he killed all the Blades members because they were raising him according to the Code of Ptarians, which emphasizes the ideals of justice and goodness and opposes those who do not follow it.
At some point, Ptaris deemed the Blades to be non-compliant with these ideals and killed them all.
Blades of the Fracture in Act 3
The quest “Rescue Omelum” is associated with the Blades of the Fracture in Act 3. If everyone dies, the mission will end.
Additionally, you can kill the rampaging Githyanki Ptaris if you wish:
Not Giving the Egg
If you decide not to give the egg to Lady Esther, another option emerges:
- Refuse her offer.
- Give another egg.
Giving Another Egg
If you have a Bear Owl egg leftover from the cave near the Decrepit Village (with a chest bearing Selune’s seal nearby), you can give it to Esther instead.
Choose one of three dialogue options:
- [Nature]: “The curves, color, size — I think it’s all correct.” (Wisdom check, Difficulty — 21)
- [Deception]: “No, but it’s worth much more. And it can be yours!” (Charisma check, Difficulty — 21)
- [Persuasion]: “No, of course not. This is a Bear Owl egg. But I don’t think your employers will see the difference.” (Charisma check, Difficulty — 21)
In any of these scenarios, Lady Esther will also reward you with around 250 gold.
Important!
Selling the Bear Owl egg to another merchant later can fetch you 750 gold, which is more profitable.
Consequences
Just like with the Githyanki, the hatched Bear Owl will kill all members of the Blades of the Fracture in Act 3.
Refusing Completely
If you harshly refuse or choose an appropriate dialogue option, a fight will start.
If you engage in combat with the woman, stay away from the cliff as she can push you off.
Esther will use invisibility in battle, but with the “See Invisibility” spell or Volo’s artificial eye, spotting her will not be an issue.
After defeating Lady Esther, you will find a few items for sale in her inventory.
Additionally, she will have a note from the Blades of the Fracture inviting people to find the Githyanki egg and offering a significant reward.
Consequences
In this case, you can visit the Blades of the Fracture in Act 3, talk to its members, trade, and take the quest to rescue Omelum.
Dark Urge Path
Playing as the Dark Urge provides additional choices in dialogue with Lady Esther. You can dramatically kick the Githyanki egg off the cliff, causing disapproval from Lae’zel and prompting Lady Esther to attack you immediately.
Giving the Egg to Lae’zel
In the sixth patch, new dialogues were added with Lae’zel regarding the Githyanki egg. If you refuse Lady Esther and keep the egg in your inventory, a new dialogue with Lae’zel appears in Act 3.
She will mention that the egg could hatch at any moment and should be kept safe. She will also tell you that she has decided to keep the hatchling for herself.
In the epilogue, you will learn about the fate of her new ward from the egg.