The Battle of Kaer Morhen is one of the most pivotal and intense moments in The Witcher 3: Wild Hunt. This mission serves as a high-stakes confrontation with the Wild Hunt, where players must make strategic choices that significantly affect the course and outcome of the battle. The following walkthrough will detail all the necessary steps, choices, and strategies to successfully navigate through the Battle of Kaer Morhen, ensuring that you make the best possible decisions for defense and maximize your rewards.
- The Battle of Kaer Morhen Basic Information
- Main Objectives
- Defense Choices and Best Choices
- Objective 2 Choice: Fortress Defenses
- Workshop Choice
- Laboratory Choice
- Best Choices for Fortress Defense
- Tips and Strategies
- Combat Strategies
- Wild Hunt Weaknesses and Loot
- Ciri’s New Move
- Detailed Walkthrough
- Step-by-Step Guide
- Intermediate Phases
- Defending Key Characters
- Rewards and Aftermath
The Battle of Kaer Morhen Basic Information
| Quest Number | 41 |
|---|---|
| Region | Kaer Morhen |
| Quest Location | Kaer Morhen |
| Previous Quest | The Isle of Mists |
| Next Quest | Blood on the Battlefield |
| Rewards | Gold Reward: None Exp Reward: 1000 Item Reward 1: Rose of Shaerrawed (if you choose to repair the Armory) Item Reward 2: Superior Swallow Potion (if you choose to focus on the lab.) |
Main Objectives
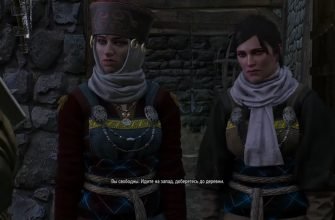
- Follow Triss and Yennefer towards the main hall of Kaer Morhen.
- Exhaust all dialogue options and plan how to defend the fortress with the others.
- Throw Dimeritium Bombs or cast the Yrden Sign to close the portals and defeat the Wild Hunt around them.
- As Ciri, help defend Triss from the Wild Hunt.
- Rush back to Kaer Morhen and close the main gates.
- Help defeat the Wild Hunt while slowly retreating toward Triss.
- As Ciri, defeat the Wild Hunt to open the gates to the inner courtyard.
- Assist in defeating multiple waves of the Wild Hunt.
Defense Choices and Best Choices
During the planning phase, players have to make pivotal decisions about how to best defend Kaer Morhen. These choices will impact the difficulty of the battle and the rewards you receive.
Objective 2 Choice: Fortress Defenses
Workshop Choice
- Patch up the wall: This reduces the number of Wild Hunt waves you need to fight during Objective 8 by one.
- Let’s clear the armory: This option grants you the Relic Silver Sword Rose of Shaerrawed before facing the Wild Hunt.
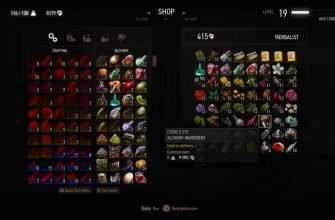
Laboratory Choice
- Potions’ II be the most useful: This provides a Superior Swallow recipe and a Fortified Rafard’s Decoction recipe if you have completed the secondary quest “Following the Thread.”
- Witchers’ traps – that’s the best idea: This litters the entire fortress with Witchers’ traps, making it easier to maneuver during the heavy battles.
Best Choices for Fortress Defense
- For the Workshop Choice, it is generally recommended to choose “Patch up the wall” to minimize the number of enemies you face. Choose the alternative only if you haven’t acquired better swords throughout the game.
- For the Laboratory Choice, “Witchers’ traps – that’s the best idea” is the best option because multiple traps inside the fortress help you move around and prevent being surrounded by multiple enemies. The upgraded potions can be looted from chests throughout the game, so prioritizing traps offers a more tactical advantage.
Tips and Strategies
Combat Strategies
- Coat your Silver Sword in Elementa Oil to deal bonus damage to the Wild Hunt.
- When attacking, stop your combo at 2 strikes. Most of the Wild Hunt will parry the third strike and shove you away, causing you to stagger.
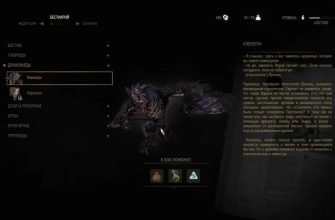
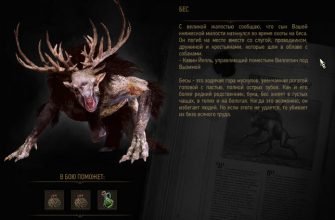
Wild Hunt Weaknesses and Loot
- Hounds of the Wild Hunt: Coat your Silver Sword in Elementa Oil. Use Dimeritium Bombs to block their invulnerability ability. The Igni Sign is effective as they are prone to burning, providing you with a considerable opening to attack.
Ciri’s New Move
Ciri has a new move that significantly helps in battle. Pressing R1 on the PS4 or R on the Switch calls down a meteor to her position, dealing heavy damage and staggering the enemy.
Detailed Walkthrough
The Battle of Kaer Morhen starts directly after completing “The Isle of Mists” and segues into the next intense quest “Blood on the Battlefield.” Here is a step-by-step guide to completing the quest, ensuring that you make the best choices and are ready for all challenges.
Step-by-Step Guide
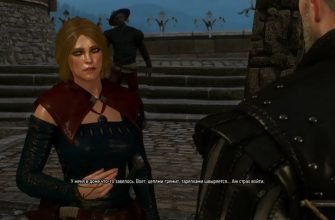
- After the cutscene with Ciri and Geralt at Kaer Morhen, follow Triss and Yennefer to the main hall to plan the defense.
- Engage in the council meeting where all gathered resources and allies will be discussed. Ensure you have completed all major NPC-related quests to maximize your ally count.
- Make key choices regarding Fortress defenses during the council:
- Workshop: Choose between “Patch up the wall” and “Let’s clear the armory.”
- Laboratory: Choose between “Potions’ll be the most useful” or “Witchers’ traps – that’s the best idea.”
- Fight several initial waves of the Wild Hunt, managing portals with Dimeritium Bombs or the Yrden Sign.
- As Ciri, defend Triss from the Wild Hunt to keep her safe while Geralt closes the gates.
- Return to Kaer Morhen with urgency, securing the fortress gates to prevent further enemy influx.
- Continuously aid your companions in pushing back the Wild Hunt forces while moving towards inner defenses.
- As Ciri, engage enemies to open the gates to the inner courtyard where the final confrontation will take place.
- Within the inner courtyard, fight through multiple waves of the Wild Hunt. Utilize the Witchers’ traps if selected during planning to manage large groups of enemies.
Intermediate Phases
After the initial confrontations near the gates, a series of intermediate combat phases will unfold, where coordination with NPCs and the timely use of abilities and items will be crucial.
Defending Key Characters
During the battle, certain NPCs will be specific targets for the Wild Hunt. It’s crucial to monitor their health and provide support:
- Ensure Triss can effectively use her magic by keeping enemies at bay.
- Protect Yennefer as she closes any remaining portals to stop the enemy influx.
- Coordinate with Vesemir and Lambert to manage heavy enemy traffic and prevent being overwhelmed.
Rewards and Aftermath
- Experience Points: Successfully completing the battle nets you 1000 XP, with prior quest completion possibly adding more.
- Items:
- Rose of Shaerrawed (if you chose to repair the Armory).
- Superior Swallow Potion (if you focused on the lab).
Concluding “The Battle of Kaer Morhen” successfully sets the stage for the following quest “Blood on the Battlefield,” marking a profound shift in the narrative and bringing players closer to confronting the looming threat of the Wild Hunt.